Hiding TV wires in a wall requires careful planning to meet electrical safety codes and prevent fire hazards. According to the National Fire Protection Association (NFPA), improper electrical installations are a leading cause of residential fires in the U.S. This guide walks you through the steps of safely concealing TV wires, from choosing the right materials to complying with National Electrical Code (NEC) standards. Whether you’re mounting a new flat-screen TV or upgrading an existing setup, you’ll learn how to hide wires without compromising safety or breaking the bank.
At a Glance
- Safety First: Never run low-voltage wires (HDMI, coaxial, speaker) through electrical conduit meant for AC power.
- Code Compliance: NEC Article 300.22(C) requires Class 2 and Class 3 wiring (like TV cables) to be separated from power conductors unless installed in a listed raceway.
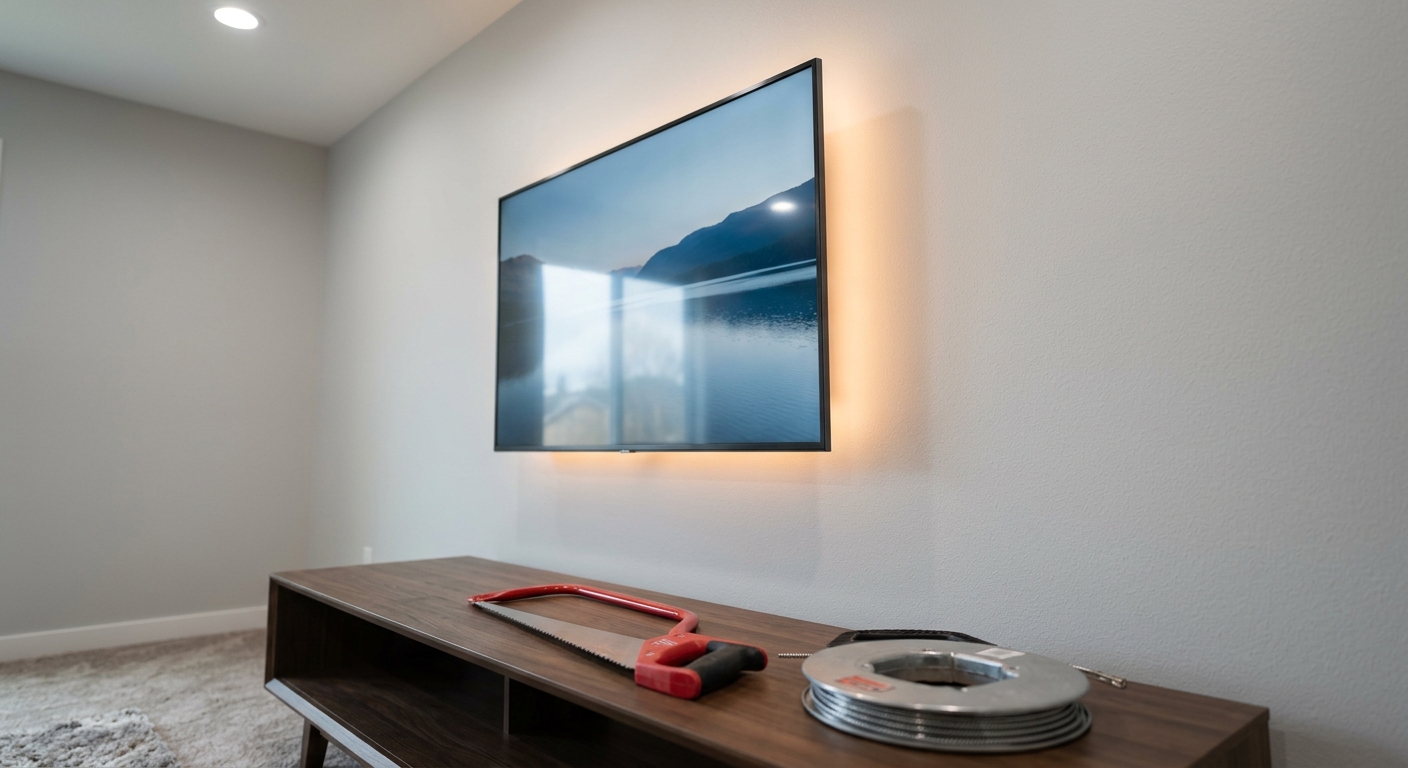
- Tools Needed: Fish tape, drywall saw, level, stud finder, drill, fish rods, voltage tester, fish stick.
- Best Methods: In-wall media enclosures, surface-mounted raceways, or low-voltage wire kits designed for TV installations.
- Power Considerations: Always use a UL-listed in-wall power kit or plug-in power behind the TV to avoid overloading circuits.
Why Hiding TV Wires in the Wall Is Tricky (And How to Do It Right)
Many homeowners assume running wires through walls is as simple as cutting a hole and tucking cables behind the drywall. But the reality is more nuanced. Low-voltage TV cables—like HDMI, coaxial, or speaker wires—must never share a path with electrical wiring unless properly separated. According to Electrical Contractor Magazine, mixing low-voltage and high-voltage wiring can create electromagnetic interference (EMI), damage your equipment, or even pose a fire risk if insulation is compromised.
There are three main categories of TV wire concealment, each with its own safety and code implications:
- In-wall media enclosures: These are UL-listed devices that house your TV, soundbar, gaming consoles, and wiring behind a flush-mounted panel. They’re designed to keep low-voltage wiring separate from power wiring.
- Surface-mounted raceways: Plastic or metal channels that run along the baseboard or wall. They’re not truly “hidden” but protect wires from damage and are code-compliant.
- Low-voltage wire kits: Pre-packaged systems that include everything needed to fish wires from the TV location to an outlet or media panel without cutting into structural framing.
Before you begin, understand the difference between low-voltage and high-voltage wiring. Low-voltage wiring (Class 2 or 3) includes HDMI, coaxial, speaker, and network cables. These are safe to run through walls if installed correctly. Electrical wiring (120V/240V) must be kept at least 2 inches away from low-voltage wiring or enclosed in separate conduit. According to the Occupational Safety and Health Administration (OSHA), improper separation can lead to voltage induction and equipment failure.
Another common mistake is running TV wires through existing electrical outlets or through the same stud bay where electrical wiring is present. This violates NEC Article 300.22(C), which requires Class 2 and Class 3 wiring to be separated by barriers or installed in a raceway when in the same stud space as power wiring.
This guide focuses on the safest and most code-compliant method for DIY homeowners: using an in-wall media enclosure or low-voltage cable kit. These solutions are designed specifically for TV installations and simplify the process while ensuring safety.
What You’ll Need: Tools and Materials for Safe TV Wire Concealment
Before you start cutting drywall or fishing wires, gather the right tools and materials. Here’s a complete checklist based on the safest installation methods:
Essential Tools
- Stud finder – To locate studs and avoid drilling into electrical wiring.
- Voltage tester – Confirms that circuits are off before you begin work.
- Drywall saw or oscillating tool – For cutting clean access holes.
- Fish tape or fish rods – Flexible rods or tape used to pull wires through walls.
- Drill with 1-inch spade bit – For drilling holes through studs and fire blocks.
- Level – Ensures your cuts and mounts are plumb and aligned.
- Needle-nose pliers – For pulling and securing wires.
- Wire strippers and crimp tool – If you’re splicing or extending wires.
- Fish stick or glow rod – A flexible fiberglass rod with a hook for guiding wires around corners.
Recommended Materials
The materials you need depend on the method you choose:
For In-Wall Media Enclosures
- UL-listed in-wall media enclosure kit – Examples include the Sanus VLT6-B1 or Chief RPAV Series. These kits include brackets, mounting plates, and cable management components.
- HDMI, coaxial, and speaker cables – Choose CL2 or CL3 rated cables for in-wall installation.
- Low-voltage wall plate and keystone jacks – For terminating cables at the outlet.
- Fireblock sealant – UL-listed sealant to seal holes around cables where they pass through fire blocks.
For Low-Voltage Cable Kits
- Pre-terminated low-voltage cable kit – Brands like Monoprice or CableOrganizer offer kits with HDMI, optical audio, and coaxial cables pre-measured for standard TV setups.
- Wall plate and in-wall speaker boxes – If hiding speakers behind drywall.
- Cable ties and P-clips – For securing wires along framing members.
For Surface-Mounted Raceways
- Surface raceway kit – Available in white, black, or wood-grain finishes. Look for UL-listed models.
- Adhesive-backed raceway – For renters or those avoiding drywall cuts.
- Cable management clips – To secure wires inside the raceway.
Pro Tip: Always buy extra cable. It’s easier to trim excess than to re-run a wire that’s too short. Aim for at least 10% extra length at both ends.
Safety Gear
Don’t skip this step. Even a minor electrical shock can be dangerous. Wear:
- Safety glasses – Protects eyes from drywall dust and debris.
- Dust mask – Drywall cutting creates fine dust.
- Work gloves – Protects hands from sharp edges and wiring.
- Non-slip shoes – Especially when working on ladders or scaffolding.
Step-by-Step: How to Hide TV Wires in Wall Safely (Best Method for DIYers)
This step-by-step guide covers the safest and most code-compliant method: installing an in-wall media enclosure. This approach keeps low-voltage wiring separate from electrical wiring and meets NEC requirements.
Step 1: Plan Your Route and Mark Key Locations
Start by deciding where your TV will be mounted and where you want the wires to exit the wall. Common options include:
- Behind the TV: Wires exit through a small hole behind the TV bracket and run through the wall to an outlet or media panel.
- To an outlet below the TV: Wires exit through a wall plate below the TV and are hidden behind furniture.
- To a media console: Wires run to a built-in cabinet or entertainment center.
Use a stud finder to mark stud locations and avoid drilling into electrical wiring. According to the Electrical Safety Foundation International (ESFI), 60% of DIY electrical accidents involve hitting hidden wires or pipes.
Use painter’s tape to mark the following on your wall:
- TV mounting location (top and bottom edges).
- Stud locations (every 16 inches).
- Proposed hole locations for the media enclosure and cable exits.
Double-check your route with a voltage tester before cutting. If you detect live wires in the proposed path, adjust your route immediately.
Step 2: Cut Access Holes and Prepare the Wall
Most in-wall media enclosures require two holes: one behind the TV and one at the outlet or media panel location. Here’s how to cut safely:
- Cut the TV hole first. Measure the enclosure’s template (usually included in the kit) and trace it onto the wall. Use a level to ensure it’s plumb.
- Use a drywall saw or oscillating tool. Cut slowly and steadily to avoid damaging surrounding drywall.
- Check for obstructions. If you hit a stud or fire block, stop and reposition if possible. You can drill through fire blocks if necessary, but seal the hole afterward with fireblock sealant.
- Cut the outlet hole. This is typically a 2-inch hole for a low-voltage wall plate. Use the same method, but ensure it’s level with the TV hole for a clean wire run.
After cutting, vacuum the dust and inspect the hole edges for sharp edges. Sand if needed to prevent cable damage.
Step 3: Fish the Wires from the TV to the Outlet
Now comes the tricky part: getting the wires from behind the TV to the outlet without damaging drywall or wiring. Here’s the safest way:
- Assemble your fish rods. If using fiberglass rods, attach a hook or loop to the end. If using a fish tape, coil it and feed it into the wall from the outlet hole toward the TV hole.
- Insert the rod through the stud bay. Avoid drilling holes through studs—this weakens the wall and can damage wiring. Instead, route wires through the stud bay (the space between studs).
- Feed the wire through the rod’s hook. Gently pull the rod back toward the outlet hole, guiding the wire along the path.
- Use a glow rod if needed. For long or complex runs, a glow rod (with a light tip) helps you see inside the wall and avoid obstructions.
- Secure the wire at the TV end. Once the wire exits the TV hole, tape or clamp it to the back of the TV bracket or mount for a clean finish.
Pro Tip: If you’re installing multiple cables (HDMI, coaxial, speaker), bundle them together with Velcro ties every 2 feet to prevent tangling.
If you encounter a fire block (a horizontal board between studs), you’ll need to drill through it carefully. Use a 1-inch spade bit and drill slowly to avoid splintering the wood. Seal the hole afterward with fireblock sealant to maintain fire resistance.
Step 4: Install the In-Wall Media Enclosure
With the wires in place, it’s time to install the enclosure. This step varies by brand, but the general process is similar:
- Attach the mounting bracket. Most enclosures come with a bracket that screws into the stud bay. Use a level to ensure it’s plumb.
- Route the wires through the enclosure’s grommets. These are plastic or rubber holes that protect cables from sharp edges.
- Mount the TV bracket. Follow the manufacturer’s instructions, ensuring the TV is secure and level.
- Connect the wires to the wall plate. Use keystone jacks for HDMI, coaxial, or speaker wires. These snap into a low-voltage wall plate, creating a flush, professional finish.
Code Note: The bracket must not interfere with electrical wiring. Keep at least 3 inches of clearance from any electrical outlet or wiring.
Safety Tip: Never pinch or kink low-voltage wires—they can degrade over time and cause signal loss.
Pro Tip: If your TV is heavy, consider using a mount designed for in-wall enclosures, which distributes weight across the stud bay.
Code Compliance: All low-voltage plates must be labeled “Class 2” or “Class 3” and meet NEC requirements.
Step 5: Seal Gaps and Test Your Setup
Before closing up the wall, ensure everything is secure and safe:
- Seal around wires with fireblock sealant. This is required by NEC to maintain fire resistance in stud bays. Apply a bead around each wire where it passes through fire blocks or top/bottom plates.
- Use grommets or bushings. These protect wires from sharp drywall edges and reduce the risk of insulation damage.
- Test all connections. Plug in your devices and test HDMI, audio, and internet connections. Look for signal dropouts or interference, which may indicate poor cable routing.
- Check for loose cables. Gently tug each wire to ensure it’s securely fastened. Loose wires can pull out of jacks or become damaged over time.
Fact Check: According to the U.S. Consumer Product Safety Commission (CPSC), 43% of TV tip-over injuries involve improperly secured TVs or cables.
Safety Tip: Never use duct tape or masking tape to secure wires in a wall—these adhesives degrade over time and can leave residue.
Once everything is tested and secure, patch the drywall holes with joint compound, sand smooth, and paint to match your wall.
Common Mistakes to Avoid When Hiding TV Wires in Wall
Even experienced DIYers make mistakes when concealing TV wires. Here are the most common—and how to avoid them:
Mistake 1: Mixing Low-Voltage and High-Voltance Wiring
Problem: Running HDMI or coaxial cables through the same stud bay as electrical wiring can cause electromagnetic interference (EMI), damage equipment, or even start a fire if insulation is compromised.
Solution: Keep low-voltage and high-voltage wiring at least 2 inches apart or enclosed in separate raceways. Use in-wall media enclosures designed to separate wiring types.
Mistake 2: Skipping the Voltage Tester
Problem: Assuming a circuit is off without testing can lead to electrical shock or damage to tools.
Solution: Always use a non-contact voltage tester before drilling, cutting, or touching any wires. Test outlets, switches, and junction boxes in the work area.
Pro Tip: Turn off the circuit breaker and lock it out using a breaker lock or tag. This prevents accidental re-energization.
Mistake 3: Cutting Through Studs or Fire Blocks Without Planning
Problem: Drilling through studs or fire blocks weakens the wall’s structural integrity and can damage hidden wiring or plumbing.
Solution: Use a stud finder and avoid drilling through studs. If you must drill through fire blocks, use a 1-inch spade bit and seal the hole with fireblock sealant afterward.
Mistake 4: Using Non-Rated Cables for In-Wall Installation
Problem: Regular HDMI or speaker cables are not fire-resistant and can contribute to fire spread if damaged or overloaded.
Solution: Use CL2 or CL3 rated cables, which meet NEC requirements for in-wall installation. These cables have flame-retardant jackets and are designed to handle heat and moisture.
Mistake 5: Overloading Power Outlets Behind the TV
Problem: Plugging multiple power strips or high-wattage devices (like soundbars or gaming consoles) into a single outlet can overload the circuit and cause overheating.
Solution: Use a UL-listed in-wall power kit or plug-in power strip with overload protection. According to the National Electrical Manufacturers Association (NEMA), overloaded circuits are a leading cause of residential electrical fires.
Mistake 6: Ignoring GFCI Protection
Problem: Outlets near water sources (like kitchens or bathrooms) should be GFCI-protected, but many homeowners overlook this when adding new outlets.
Solution: If your TV is in a kitchen, bathroom, or basement, install a GFCI outlet or use a GFCI-protected power strip. For more details, see our guide on GFCI Outlet Safety Tips.
Alternative Methods: Surface Raceways, Behind-Baseboard, and More
Not every homeowner wants to cut drywall. Fortunately, there are alternative methods for hiding TV wires that don’t require major renovation:
Option 1: Surface-Mounted Raceways
Surface raceways are plastic or metal channels that run along the baseboard, wall, or ceiling. They’re not “hidden,” but they protect wires from damage and are code-compliant.
Steps:
- Measure and cut the raceway. Most kits come with pre-scored sections for easy trimming.
- Apply adhesive or screws. Use the included adhesive for renters or screws for a permanent hold.
- Route the wires. Use cable ties to secure wires inside the raceway.
- Install end caps. These cover the openings and give a finished appearance.
Pro Tip: Choose a raceway that matches your wall color for a seamless look.
Pros: No drywall cutting, easy to install, code-compliant.
Cons: Visible, limited to straight runs.
Option 2: Behind-Baseboard or Crown Molding
This method hides wires behind baseboard trim or crown molding. It’s ideal for homes with decorative trim and avoids drywall damage.
Steps:
- Remove a section of baseboard. Use a pry bar to gently remove a 2–3 foot section.
- Route the wires behind it. Tuck wires into the gap between the baseboard and wall.
- Reattach the baseboard. Use construction adhesive and small finish nails to secure it back in place.
Safety Tip: Use a fish stick to guide wires through the gap without damaging drywall.
Pros: Hidden, no drywall damage, works with existing trim.
Cons: Limited to straight runs, may not work in all homes.
Option 3: Behind Furniture or Media Consoles
If you have a TV stand, entertainment center, or built-in shelving, you can route wires behind the furniture instead of the wall.
Steps:
- Use cable ties or raceways. Bundle wires together and secure them to the back of the furniture.
- Route wires through gaps. Use existing holes in the wall or furniture to hide wires.
- Label cables. Use cable tags to keep connections organized and avoid tangles.
Pros: No drywall cutting, flexible, easy to update.
Cons: Not truly hidden, can look messy if not managed.
Option 4: Wireless Solutions (Where Applicable)
For HDMI and audio signals, consider wireless HDMI kits or Bluetooth soundbars. These eliminate the need to run wires altogether.
Examples:
- Wireless HDMI extenders: Transmit 4K HDR signals up to 100 feet.
- Bluetooth soundbars: Eliminates the need for optical or coaxial cables.
- Powerline networking: Uses your home’s electrical wiring to extend internet signals.
Pros: No wires, easy to install, flexible.
Cons: May introduce latency, limited range, requires power outlets.
Note: Wireless solutions are not a substitute for power wiring. You’ll still need to power your TV and devices.
Code and Safety Standards for Hiding TV Wires
Understanding electrical codes is essential for safe TV wire concealment. Here’s what you need to know:
National Electrical Code (NEC) Requirements
The NEC is the standard for electrical safety in the U.S. Key articles for TV wire concealment include:
- NEC Article 300.22(C): Covers Class 2 and Class 3 wiring in ducts, plenums, and other air-handling spaces. For residential walls, it requires separation from power wiring or enclosure in a raceway.
- NEC Article 725: Classifies low-voltage wiring (like HDMI and speaker cables) and sets requirements for installation.
- NEC Article 760: Covers fire alarm wiring, but also applies to other low-voltage systems.
- NEC Article 800: Covers communications wiring, including coaxial cables.
Key Takeaway: If you’re running low-voltage wires through a wall, they must be separated from electrical wiring by at least 2 inches or enclosed in a raceway. This is non-negotiable for safety.
Fireblock Sealant Requirements
Fireblock sealant is a fire-resistant material used to seal holes around cables where they pass through fire blocks (horizontal studs between floors) or top/bottom plates. According to the International Code Council (ICC), this is required to maintain fire resistance in walls.
When to use fireblock sealant:
- Around each wire where it passes through a fire block.
- Around the perimeter of media enclosures or outlet boxes.
- Where wires enter or exit a wall cavity.
How to apply: Use a caulking gun to apply a bead around the wire, filling the gap completely. Smooth with a finger or putty knife.
UL Listing and Product Safety
Look for the UL mark on all products you use, including:
- In-wall media enclosures
- Low-voltage wall plates
- Cables (CL2 or CL3 rated)
- Raceways and conduit
- Power strips and surge protectors
Why it matters: UL-listed products have been tested for safety and compliance with NEC standards. Unlisted products can pose fire or shock hazards.
Pro Tip: Avoid cheap, unbranded cables or enclosures. They may not meet safety standards and can void your homeowner’s insurance if they cause a fire.
Best Tools for Hiding TV Wires in Wall
Not all tools are created equal. Here are the top-rated options for DIYers, based on safety, ease of use, and reliability:
Top Fish Tapes and Rods
| Tool | Type | Length | Best For | Price Range |
|---|---|---|---|---|
| Klein Tools 100-ft Fish Tape | Steel fish tape | 100 ft | Long runs, commercial-grade | $40–$60 |
| Southwire 25-ft Fiberglass Fish Rods | Fiberglass rods | 25 ft | Residential walls, DIY-friendly | $25–$40 |
| Glow Rod Fiberglass Fish Set | Glow-in-the-dark rods | 15 ft | Dark walls, complex routes | $30–$50 |
Why fiberglass rods win: They’re flexible, lightweight, and don’t conduct electricity—unlike steel fish tapes, which can short out if they contact live wires.
Top In-Wall Media Enclosures
| Enclosure | Max TV Size | Weight Capacity | UL Listing | Price Range |
|---|---|---|---|---|
| Sanus VLT6-B1 | 65″ | 150 lbs | Yes | $120–$180 |
| Chief RPAV Series | 70″ | 200 lbs | Yes | $150–$220 |
| Mounting Works IWE-24 | 85″ | 250 lbs | Yes | $180–$250 |
What to look for: UL listing, weight capacity, cable management features, and compatibility with your TV mount.
Top Low-Voltage Cable Kits
| Kit | Includes | Length | Rated | Price Range |
|---|---|---|---|---|
| Monoprice 10ft HDMI + Optical Audio Kit | HDMI, optical audio, RCA | 10 ft | CL2 | $25–$40 |
| CableOrganizer ClearPath Kit | HDMI, coaxial, speaker, Cat6 | 15 ft | CL3 | $50–$80 |
| Amazon Basics In-Wall HDMI Kit | HDMI, keystone jacks, wall plate | 10 ft | CL2 | $30–$50 |
Pro Tip: Buy kits with pre-terminated ends to save time. Avoid splicing wires yourself—poor splices can cause signal loss or shorts.
Troubleshooting: Why Your TV Wires Aren’t Working After Installation
It’s frustrating to finish a project only to find that your TV doesn’t turn on or the picture is pixelated. Here’s how to troubleshoot common issues:
Issue 1: No Power to the TV
Possible Causes:
- Loose power connection at the outlet or power strip.
- Tripped circuit breaker.
- Faulty power strip or surge protector.
- Incorrect wiring of the in-wall power kit.
How to Fix:
- Check the circuit breaker. Reset it if tripped. If it trips again, unplug devices and try again.
- Test the outlet. Plug a lamp or phone charger into the outlet to confirm it’s working.
- Inspect the power strip. Replace it if it’s old or damaged. For safety, see our guide on Surge Protector Safety.
- Check wire connections. If you’re using an in-wall power kit, verify that the wires are securely connected to the outlet and power source.
Code Note: In-wall power kits must be installed by a licensed electrician in some jurisdictions. Check local codes before proceeding.
Issue 2: Pixelated or No Signal on HDMI
Possible Causes:
- Damaged or kinked HDMI cable.
- Loose connection at the keystone jack or wall plate.
- Electromagnetic interference from nearby electrical wiring.
- Cable too long for the signal type (e.g., 4K HDR requires high-speed HDMI).
How to Fix:
- Inspect the HDMI cable. Look for kinks, cuts, or bent connectors. Replace if damaged.
- Reseat the connections. Unplug and replug the HDMI cable at both ends. For keystone jacks, press firmly to ensure a secure fit.
- Check for EMI. Move the HDMI cable away from electrical wiring. If interference persists, consider using a shielded HDMI cable or a wireless HDMI extender.
- Shorten the cable run. If possible, use a shorter HDMI cable or install the TV closer to the source.
Pro Tip: Use a cable tester to verify signal integrity.
Issue 3: Audio Dropouts or Static
Possible Causes:
- Loose or damaged optical or coaxial audio cable.
- Incorrect audio settings on the TV or soundbar.
- Interference from other electronic devices.
How to Fix:
- Inspect the audio cable. Replace if damaged or frayed.
- Check audio settings. On your TV, go to Settings > Audio and ensure the correct output is selected (e.g., HDMI ARC, optical, coaxial).
- Move electronic devices. Keep audio cables away from routers, microwaves, and power strips.
Issue 4: Wires Pulling Out of Jacks
Possible Causes:
- Loose keystone jacks or wall plates.
- Excessive tension on wires.
- Poorly installed jacks.
How to Fix:
- Tighten the wall plate. Use a screwdriver to secure the plate to the outlet box.
- Use cable ties. Secure wires to the back of the TV or inside the media enclosure to reduce tension.
- Replace keystone jacks. If the jacks are loose or damaged, replace them with new ones.
Safety Tip: Ensure the outlet box is securely mounted to a stud. Loose boxes can damage wires over time.
Pro Tip: Leave a small loop of extra wire behind the TV to prevent pulling.
Where to buy: Cable management kits often include keystone jacks.
When to Call a Professional Electrician or TV Installer
While many DIYers can safely hide TV wires in a wall, there are times when calling a professional is the smartest choice. Here’s when to pick up the phone:
Signs You Need a Pro
- Your home has aluminum wiring. Aluminum wiring is a fire hazard and requires specialized handling. According to the CPSC, homes with aluminum wiring are 55 times more likely to have fire hazards.
- You’re adding new electrical outlets. If your TV setup requires a new outlet or circuit, a licensed electrician should handle the wiring to ensure code compliance.
- You’re unsure about voltage separation. If you can’t confidently separate low-voltage and high-voltage wiring, hire a pro to avoid code violations or safety risks.
- Your walls have asbestos or lead paint. Older homes may contain hazardous materials. A professional can safely remove or encapsulate these before you begin work.
- You’re mounting a heavy TV. TVs over 100 lbs require heavy-duty mounts and structural support. A professional installer can ensure the mount is securely anchored to studs.
Code Note: In many jurisdictions, adding new outlets requires a permit and inspection.
Fact Check: According to the Underwriters Laboratories (UL), 30% of TV tip-over injuries involve improper mounting.
How to Find a Licensed Professional:
- Ask for referrals from friends or neighbors.
- Check reviews on platforms like Angi or HomeAdvisor.
- Verify licenses and insurance through your state’s licensing board.
- Get multiple quotes to compare pricing and services.
FAQs About Hiding TV Wires in Wall Safely
Is it safe to run HDMI cables through the wall?
Yes, but only if the cables are CL2 or CL3 rated for in-wall use. These cables have flame-retardant jackets and meet NEC requirements. Regular HDMI cables are not fire-resistant and should not be run through walls.
Can I use electrical conduit for HDMI cables?
No. Electrical conduit is designed for high-voltage wiring (120V/240V) and is not suitable for low-voltage cables like HDMI. Using conduit for low-voltage wiring can cause signal loss and violate NEC Article 300.22(C).
Do I need a permit to hide TV wires in the wall?
It depends on your local codes. In most cases, running low-voltage wires through a wall does not require a permit. However, if you’re adding new electrical outlets or modifying existing wiring, you may need a permit and inspection. Check with your local building department.
What’s the best way to hide speaker wires in the wall?
The safest method is to use in-wall speaker wire kits, which include CL2 or CL3 rated wire and in-wall speaker boxes. These kits are designed to meet NEC requirements and reduce the risk of signal interference or fire hazards. For more details, see our guide to in-wall speaker installation.
Can I hide power cords behind the TV without cutting into the wall?
Yes, but use caution. If you’re using a plug-in power strip behind the TV, ensure it’s not overloaded and has overload protection. For a cleaner look, consider a cord shortener kit or a UL-listed in-wall power kit. Never route electrical cords through the wall—this is a fire hazard and violates electrical codes.
What’s the best cable to use for in-wall HDMI installation?
The best cables are CL2 or CL3 rated and labeled for in-wall use. These cables are fire-resistant and meet NEC standards. Look for cables with gold-plated connectors for better signal quality. Brands like Monoprice, CableOrganizer, and Amazon Basics offer reliable options.
How do I know if my TV wires are causing interference?
Signs of interference include:
- Pixelated or distorted video.
- Audio dropouts or static.
- Wi-Fi or Bluetooth connectivity issues.
- Devices not responding to remote commands.
How to fix it: Move low-voltage wires away from electrical wiring, use shielded cables, or install a wireless HDMI extender.
Can I hide TV wires in a rental apartment without damaging walls?
Yes. Use adhesive-backed raceways or cord covers to hide wires without cutting into drywall. These products are designed for renters and can be removed without damage. For a more permanent solution, consider cord shorteners or wireless transmitters.
Final Thoughts: Balancing Aesthetics and Safety
Hiding TV wires in a wall is about more than just looks—it’s about safety, code compliance, and long-term reliability. While the process may seem daunting, breaking it down into manageable steps makes it achievable for most DIYers. Remember:
- Safety first: Always test circuits, use the right cables, and keep low-voltage wiring separate from electrical wiring.
- Code matters: Follow NEC guidelines and local regulations to avoid fines or hazards.
- Plan ahead: Measure twice, buy extra cable, and test connections before closing up the wall.
- Know your limits: If the project feels too complex, call a professional electrician or TV installer.
With the right tools, materials, and approach, you can transform a cluttered TV setup into a clean, professional-looking installation that’s safe for your family and your home. Whether you choose an in-wall media enclosure, surface raceways, or wireless solutions, the key is to prioritize safety and code compliance above all else.
For more DIY electrical and home theater projects, explore our guides on DIY home theater installation or GFCI outlet safety. And if you’re looking for product recommendations, check out our roundup of top in-wall media enclosures for your next setup.
Quick Reference Checklist
- ✅ Turn off power and test circuits.
- ✅ Choose the right method (in-wall enclosure, raceway, or wireless).
- ✅ Use CL2/CL3 rated cables and UL-listed products.
- ✅ Keep low-voltage wiring separate from electrical wiring.
- ✅ Seal gaps with fireblock sealant.
- ✅ Test all connections before closing the wall.
- ✅ Patch and paint drywall holes.